Payment
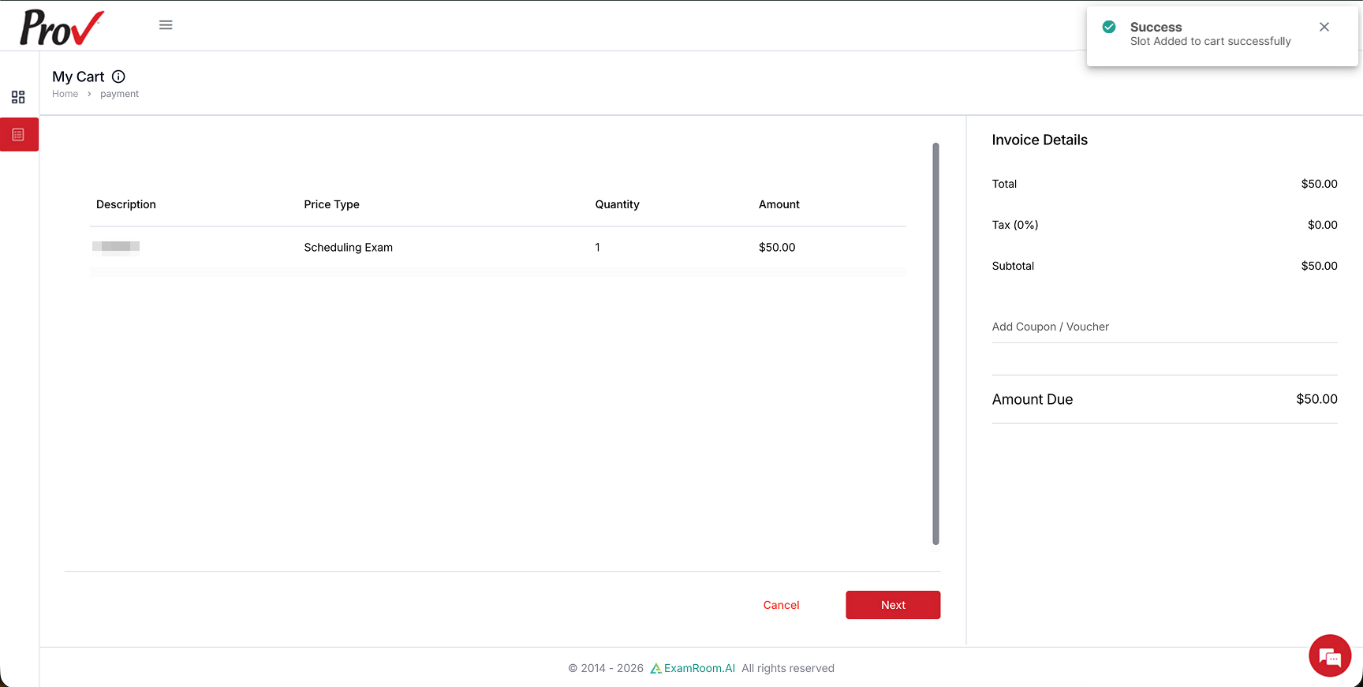
- After clicking Schedule, a pop-up at the top right of the screen shows that the exam slot has been added to the cart successfully, and you will land on the My Cart section to complete the payment.
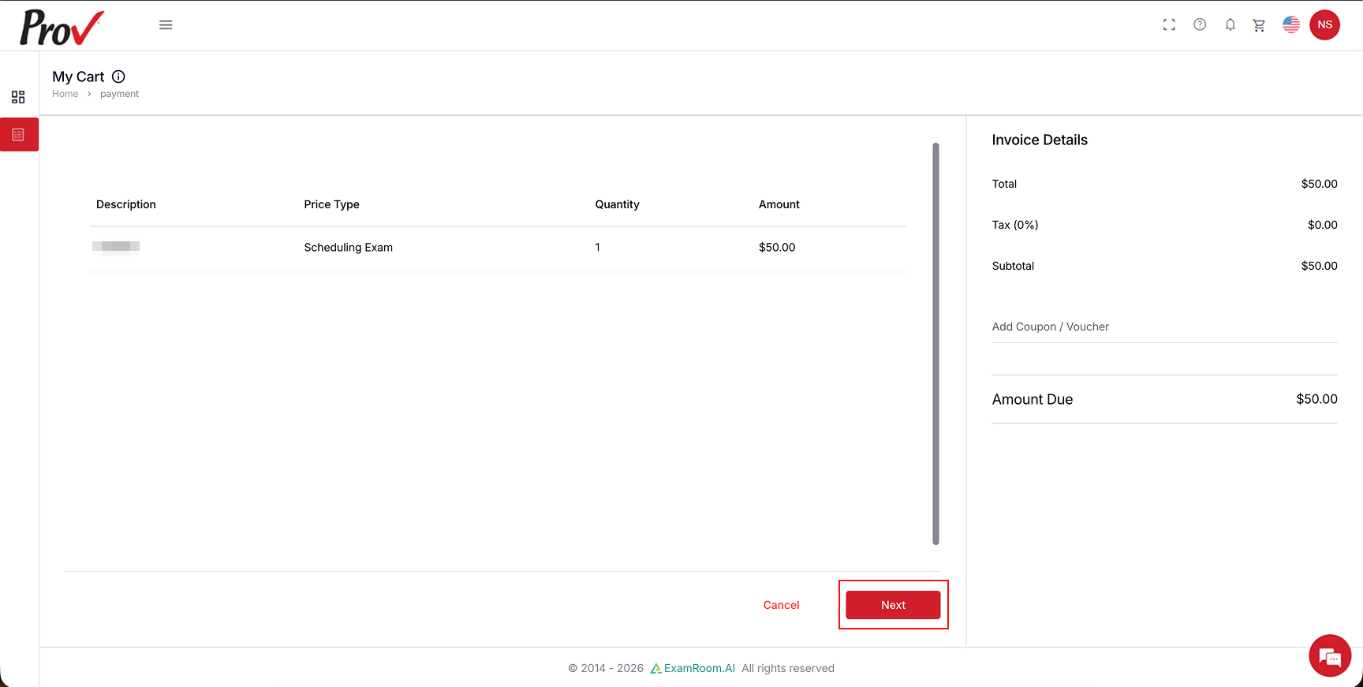
- The left half of the screen shows your cart information, including the description, price type, quantity, and amount. The right half of the screen shows the invoice details.
- Review your cart details and scroll down to click Next to proceed.
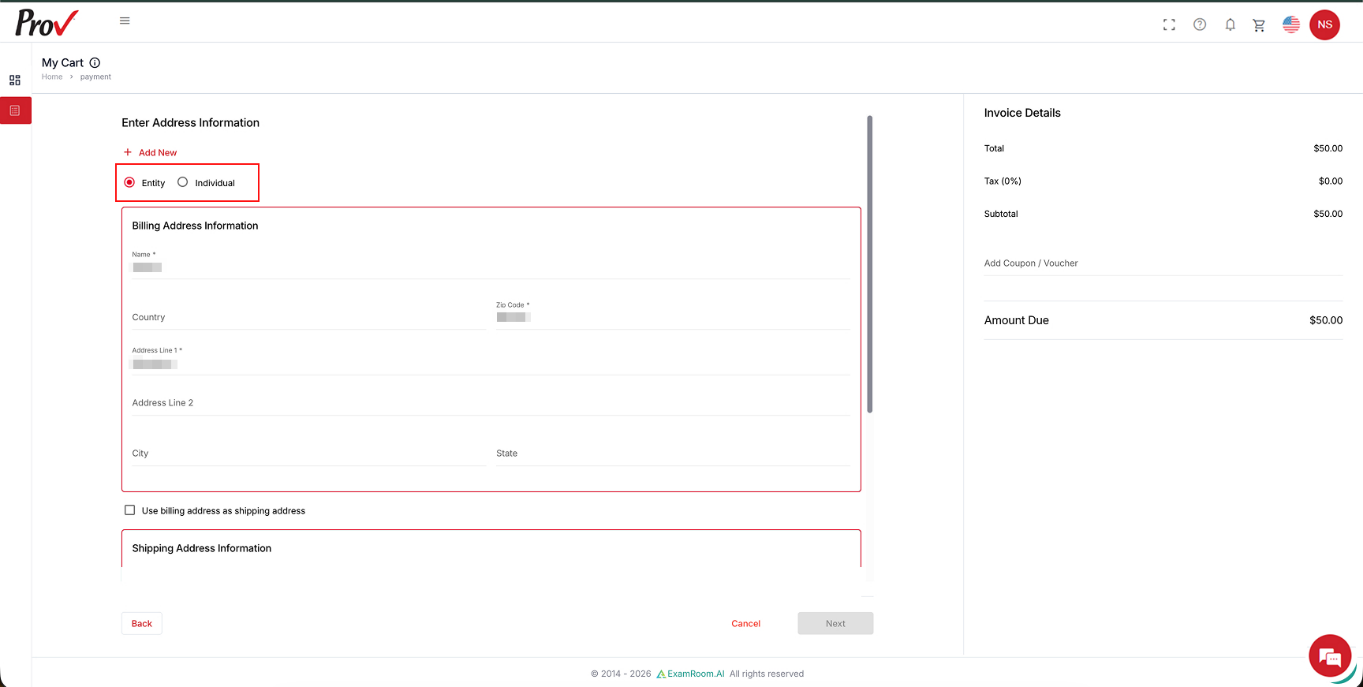
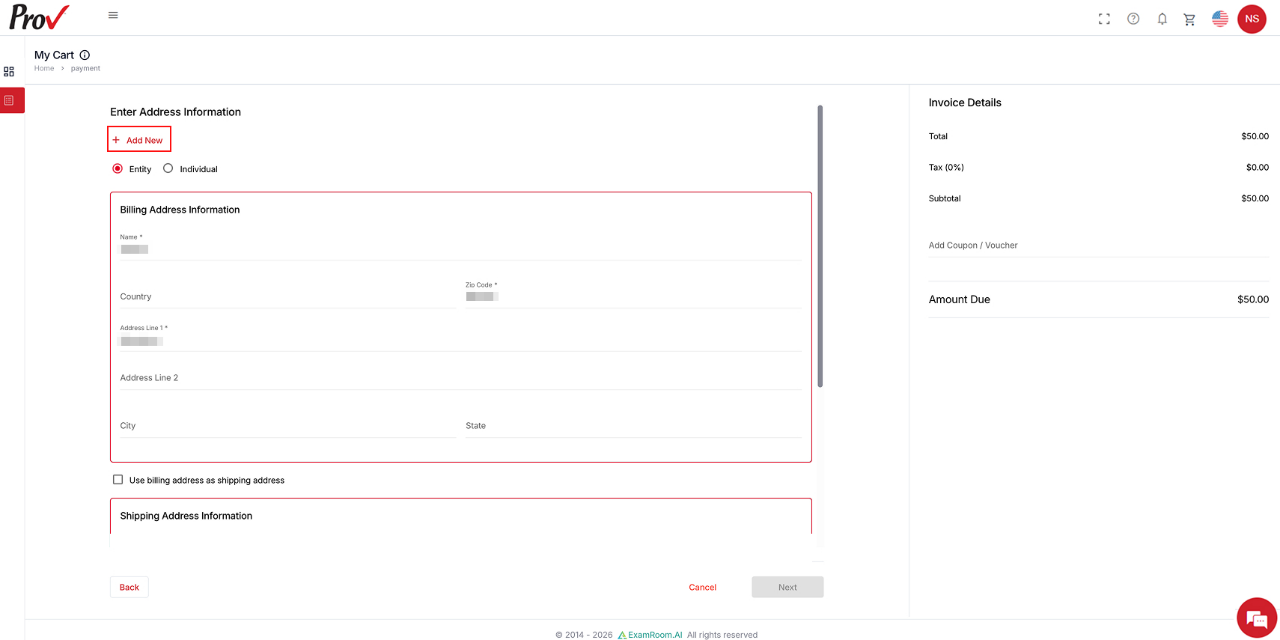
- In the address information section, select the address category Entity or Individual and fill in your billing address information.
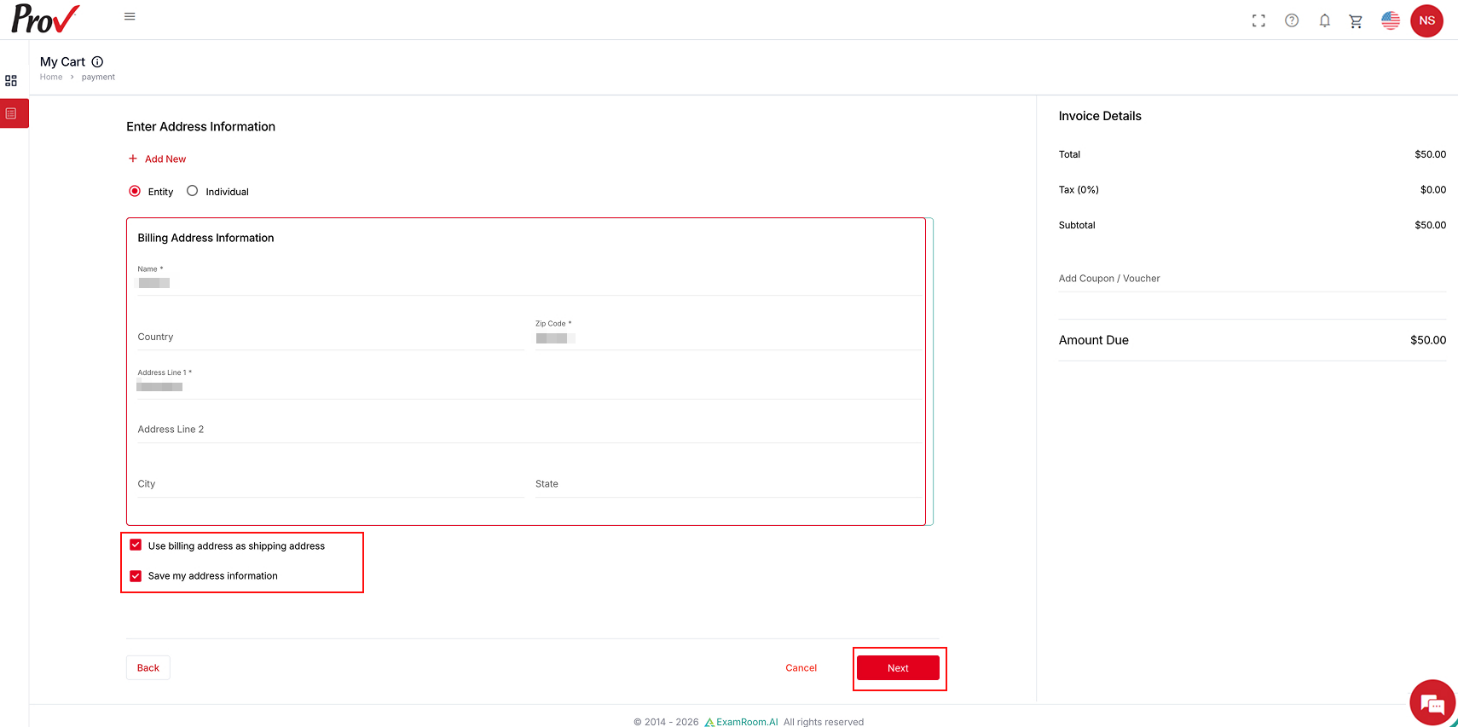
- Also, enter your Shipping Address or select “Use billing address as shipping address” if it is the same for you.
- Select “Save my address information” to have your address saved for future use.
- After updating the address, click Next to proceed.
- Note: If you have previously saved an address and want to add a new one for the current payment, click “+Add New” and enter the address in the field that appears below.
- Note: If you have previously saved an address and want to add a new one for the current payment, click “+Add New” and enter the address in the field that appears below.
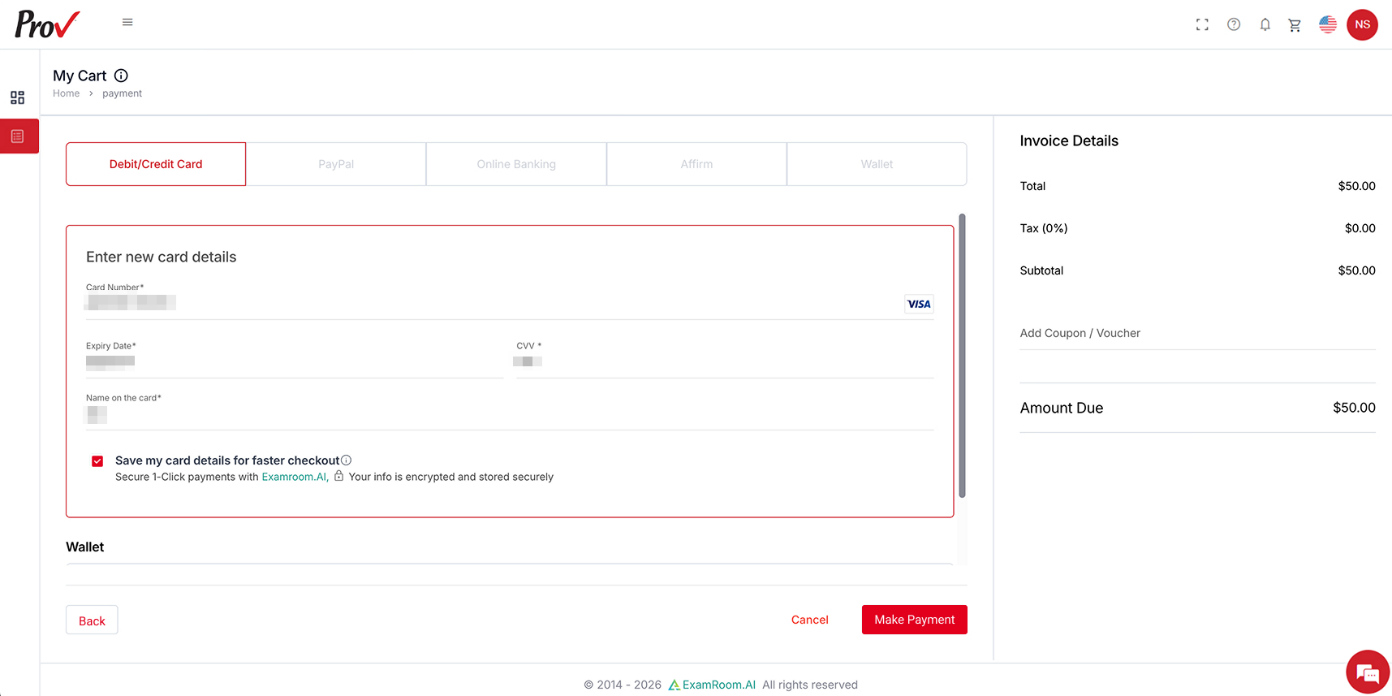
- Enter the details and click “Make Payment”. Select “Save my card details for faster checkout” to securely save your card details for faster future payments.
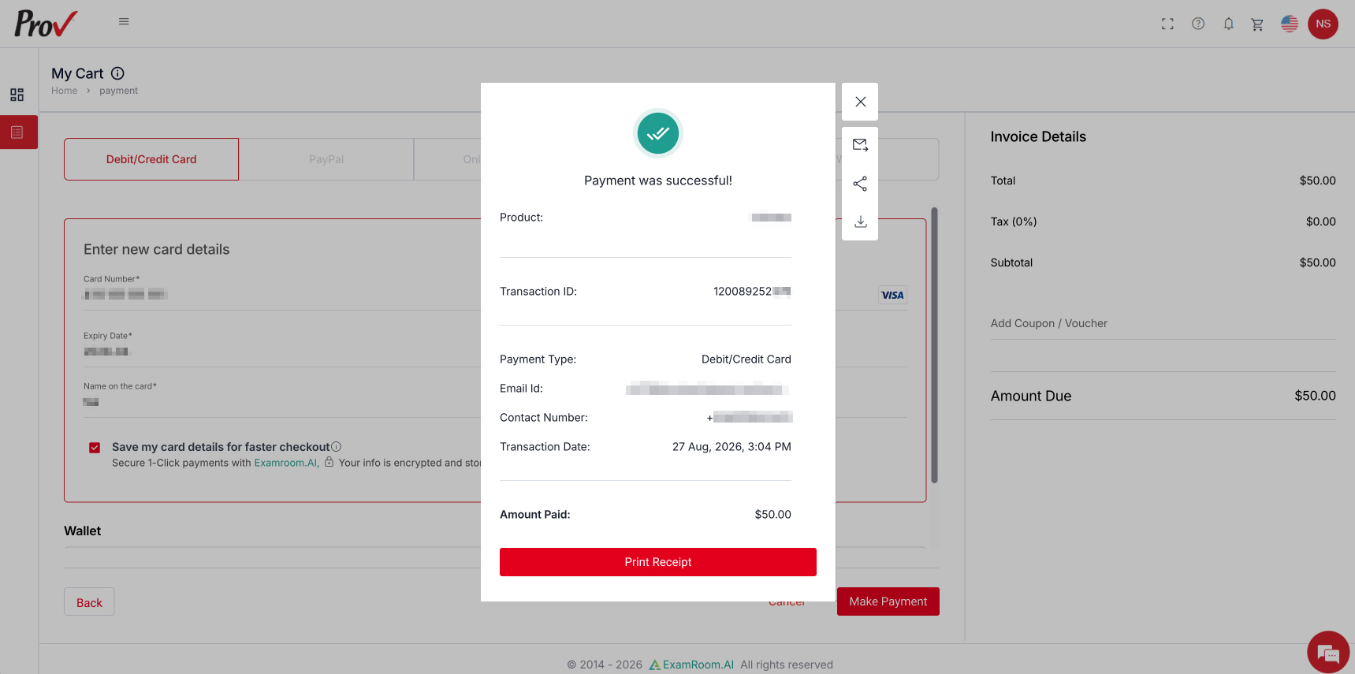
- After a successful payment, a confirmation pop-up will appear on the screen showing your payment details.
- Click “Print Receipt” to print the payment receipt, or you can directly send it to email, share it, or download it.
- The exam status on the dashboard gets updated to Exam Scheduled, which is also reflected in the Upcoming Exam section on the dashboard.